The Display page of the SPL Config dialog contains display settings for the SPL History and numeric SPL meters. The latter apply both to the in-Tab SPL/Signal Level meter that appears by default at the top of the control bar in Real-Time and Impulse Response (IR) mode in Smaart Suite and meter modules that make up the SPL Meters window and the meter bar in both Smaart SPL and Smaart Suite’s SPL mode.
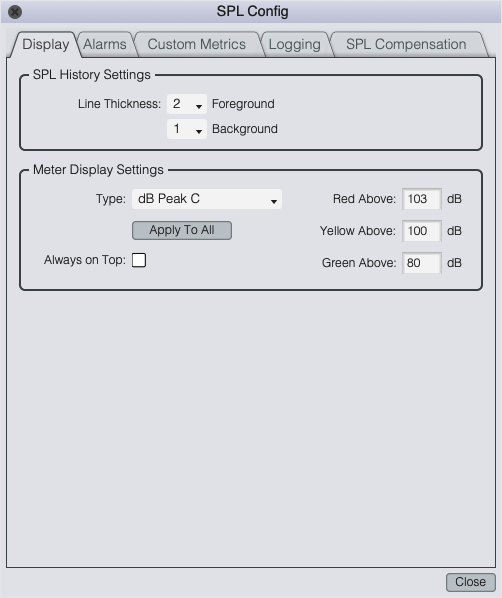
Display tab of the SPL Config dialog.
SPL History Settings
Line Thickness controls set the line thickness for line charts in the SPL History display in Smaart SPL and Smaart Suite’s SPL mode.
Foreground Trace Thickness sets the line thickness in pixels for the data trace at the top of the z axis (the frontmost trace) on all line charts.
Background Trace Thickness sets the line thickness in pixels for all data traces other than the top trace when multiple traces are displayed on any line chart.
Meter Display Settings
Values displayed on sound level meters (SPL, Leq, and Peak C, A, or Z) change colors according to the sound level thresholds specified in this section. These can be set individually for each measurement type or set once and applied to all measurement types using the Apply to All button. Typical usage for this feature would be to set the Green Above level comfortably above the self-noise level of your microphone and preamp, so that when the meter text is green, you will know that you are measuring actual sounds. The Yellow Above threshold might then be set to a sound level that normally should not be exceeded and Red Above, to a level that must not be exceeded.
Note that the SG Audio Aps 10EaZy reads its usable range figure directly from the device and ignores the global Green Above threshold. Otherwise, these settings apply to all SPL and Leq meters in Smaart SPL and Smaart Suite.
To configure thresholds for a single measurement type, select its name in the Type list, then enter threshold levels (in decibels) in the Red Above, Yellow Above, and Green Above fields. You can then apply your new settings to all other measurement types if you like by clicking the Apply to All button. You will still be able to adjust thresholds for individual measurement types after doing so.
When the Always on Top box is checked, the SPL Meters window stays in front of all the other windows on your screen when checked regardless of which window has focus.