Smaart’s Client Window enables you to display and remotely control real-time and measurements running on another computer via a network connection. Supported display types include RTA and plots from Spectrum view and Phase, and Live IR plots from Transfer Function view. The remote client can start and stop measurements, control averaging, banding, and smoothing (when applicable), and measure / set delays for transfer function measurements on the host. Network clients can also capture traces and control the host machine’s Signal generator.
Network Configuration
We recommend that at least one machine in the client-server relationship is hardwired to the network. If both are operating on wireless connections, performance may suffer. The default Port address (26000) should work fine for most purposes, and should only be changed in the event of a conflict with another application. Specifying a password for connection to the host is optional, but highly recommended.
The first time that you enable the API you may get a warning from your operating system that Smaart is attempting to access the network, asking if you want to grant permission. Be sure to select "Yes" if this happens, so that Smaart does not get blocked by your firewall. You may also need to reauthorize access in some cases after installing software updates.
Server (Host) Preparation
Ensure that both the host machine and client machine are on the same version of Smaart. Ideally, both copies should be as up to date as possible. The Client Window is available on Smaart v8, and Smaart v9 Suite/RT.
On the host copy of Smaart, configure all necessary tabs and measurements in a single Smaart window prior to connecting. No changes should be made to this window while the client is connected. The remote client window connects to a single Smaart window on the server, reading all of its tabs and measurements upon connection.
Ensure that both machines are on the same network, whether wireless or hardwired. We recommend that at least one of the machines in a client-server relationship be hardwired to the network. If both are operating on wireless connections, performance may suffer.
Enable the API on the server copy of Smaart via checkbox in the Preferences dialog. This can be reached through Options > Preferences (or the [Alt/Opt] + [O] hotkey) and navigating to the API tab. In this tab, you also have the option to set a password for connection to the host. This isn't needed but highly recommended.

The default port (26000) is fine for most networks. Only change it in the event of a conflict with another application using the same port.
You may be prompted to allow Smaart through your firewall at this time. If so, allow it. You may need to authorize access again later after installing software updates. If you experience connection issues, a good first troubleshooting step is to check your firewall settings to make sure Smaart isn’t being blocked.
Smaart can transmit data to multiple clients simultaneously, but clients cannot detect changes to measurement settings made at the server or by other clients. For example, if two clients are connected to the same host and one of them changes the averaging setting for a measurement, that change will affect the measurement data that both clients see, but only the client that modified the setting will see that it was changed.
You may therefore wish to dedicate a window on the server machine to each remote client and keep those windows minimized on the server to keep them out of harm’s way. This is an especially good idea when an operator is actively using Smaart on the host machine while remote clients are connected. In cases where just one person is using both machines, such precautions may not be necessary.
Client Preparation
Ensure the Client’s network API is disabled to prevent another copy of Smaart from trying to connect while it's operating as a client. Any installation of Smaart can serve as either a client or a server, but cannot do both at the same time.
To connect a client to the server/host machine, select View > Client Window on the client machine (or use the keyboard shortcut [Alt/Option] + [R]). You will be presented with a connection dialog like the one below. Like with the host, if this is the first time, your operating system may ask you to let Smaart access the network. Be sure to say yes, if so.

If client and server machines are both connected to the same local area network (LAN), then Smaart should be able to auto-detect the server's IP address and Port number. If there are multiple Smaart servers available on the same LAN, you can click the down arrow to the right of the Server IP Address field to see a list and make a selection. If Smaart cannot automatically detect an available server, you may need to check your firewall settings or manually enter the IP address and port number of the server computer, separated by a colon (ex: 123.456.7.890:26000).
Once you have made your selections, click the Connect button to proceed. You will be prompted for the server's password, if applicable. When Smaart has connected successfully and the server has multiple Smaart windows open, you will see another dialog asking you to choose which window you wish to emulate. If there is only one window running on the server, Smaart will simply connect to that window without a prompt.
Using the Client Window
The client window looks very much like any other Smaart application window and operates much the same way, although with some differences and limitations. The most immediately visible difference is that the SPL Meter/Clock display is replaced with server connection info.
On the Data Bar, the Data Library pane shows the client computer's local data capture repository. Captured traces from the data library on the host machine are not available to the client. However, when you capture a trace in the client window, Smaart actually captures it on the host machine and then uploads a copy to the client. The new trace data file will then exist on both machines.
Upon first connecting, the Client Window Control Bar doesn't contain any measurement engines, even if the Host Control Bar has engines set up. You're unable to create new measurement engines from the client side, so you'll have to create any engines from the server side. Any measurement engines created on the server side are immediately viewable from the Measurement Config page, accessible by either clicking the "Hammer and Wrench" button or by using the [Alt/Opt] + [G] hotkey. From here, simply drag-and-drop them from here to the Control Bar and you're ready to measure!
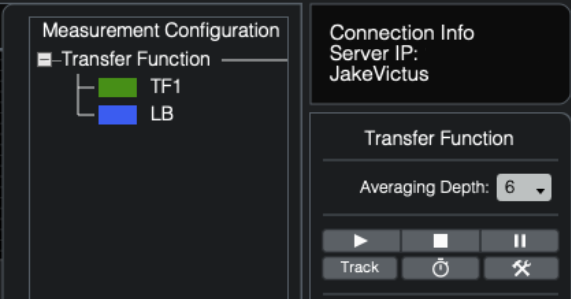
SPL/Clock display displaying Connection Info on client machine.
If you watch both the host and client windows at the same time, you will see that some changes to measurement settings in the client window affect the corresponding settings on the server, and some do not. Averaging, for example, is done at the measurement engine level and changes made will be seen on both. Banding and Smoothing, however, are post-process display functions and are done on the client end. Therefore, the server and client can have different settings for these.
Once connected, the client computer can send measurement-related commands to the host, including:
Starting/stopping the signal generator and adjusting its level
Selecting stimulus type for the generator (File unsupported)
Activating the delay finder
Capturing data
Starting/stopping measurements
Controlling averaging/banding/smoothing (as applicable)
Setting measurement delays for transfer function measurement engines running on the host
Additional Client Window Settings
Here is an overview of the additional settings you can see in the API tab of the Preferences dialog, pictured here:

Spec/TF Stream FPS sets the frame rate for the real-time spectrum and transfer function measurements in frames per second. This is set to the maximum allowable value (23 FPS) by default. You can set it to a smaller number to slow down the client's refresh rate if you need to reduce the bandwidth requirement for your network connection.
Command Timeout is the amount of time in milliseconds before an API command is abandoned by the server. This value should not be increased from the default setting of 2000 ms unless you are experiencing problems with API commands failing.
Live IR Range sets the total time range for the transfer function Live IR display in the client window (in ms). For example, a setting of 20 ms will send Live IR data in the range of -10 to +10 ms, relative to time zero. Note that larger settings increase the bandwidth requirements for network connections.